Master Configuring VTP Clients and Servers on Cisco Catalyst Switches

Configuring VTP clients and servers on Cisco Catalyst switches is a crucial skill for network engineers. It ensures seamless VLAN management across your network, a vital component in modern IT environments. Whether you’re studying for the Cisco CCNA exam or managing an enterprise network, mastering this process is essential.
This guide’ll cover how to configure VTP client and server modes step-by-step, complete with lab examples, troubleshooting tips, and a helpful external resource link to enhance your understanding.
What Is VTP and Why Is It Important?
The VLAN Trunking Protocol (VTP) is a Cisco-proprietary protocol simplifying VLAN management. It allows you to configure VLANs on a central switch and propagate these configurations across a network of connected switches.
Key Benefits of VTP
- Centralized VLAN management reduces configuration complexity.
- Minimizes errors in VLAN setup and updates.
- Improves operational efficiency by automating VLAN propagation.
Lab Objective: Configuring VTP Clients and Servers
This lab focuses on configuring VTP clients and servers on Cisco Catalyst switches. By default, Cisco switches operate in server mode. You’ll set up a server, a client, and a trunk to enable VLAN sharing between them.
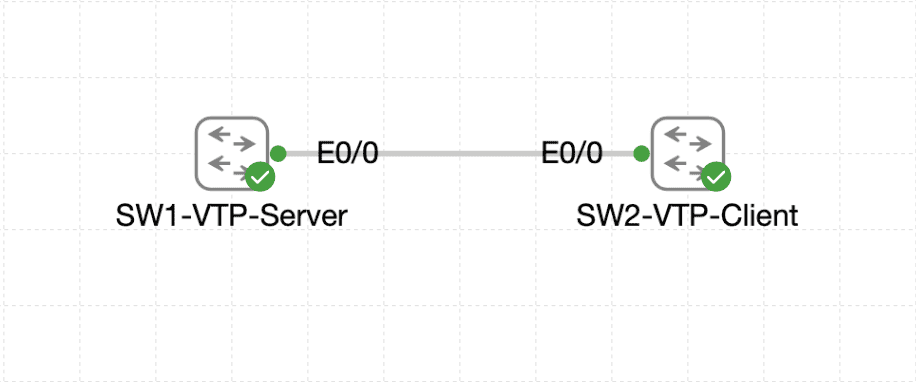
Network Topology
[Switch1 - VTP Server] — [Trunk] — [Switch2 - VTP Client]
Lab Prerequisites
- Two Cisco Catalyst switches
- A simulator (e.g., GNS3 or Packet Tracer)
- Basic understanding of VLANs and trunking
Step-by-Step Guide to Configuring VTP Clients and Servers
1. Verify Default VTP Mode
By default, Cisco switches operate in server mode. Confirm the VTP mode on each switch:
Switch# show vtp status
2. Configure the VTP Server
On Switch1, configure the switch as a VTP server and assign a domain:
Switch1(config)# vtp domain LabDomain
Switch1(config)# vtp mode server
Switch1(config)# vtp version 2
Create a VLAN on the server to test the configuration:
Switch1(config)# vlan 10
Switch1(config-vlan)# name TestVLAN
3. Configure the VTP Client
On Switch2, configure the switch as a VTP client:
Switch2(config)# vtp domain LabDomain
Switch2(config)# vtp mode client
Switch2(config)# vtp version 2
4. Configure the Trunk
Enable VLAN sharing by configuring a trunk between the switches:
Switch(config)# interface FastEthernet0/1
Switch(config-if)# switchport mode trunk
Switch(config-if)# switchport trunk encapsulation dot1q
5. Verify Configuration
Confirm the VTP configuration:
Switch# show vtp status
Ensure that the VLAN from the server is visible on the client:
Switch2# show vlan brief
Troubleshooting Tips
Common issues in configuring VTP clients and servers include:
Mismatched VTP Domain Names
Ensure all switches in the network use the same domain name:
Switch# show vtp status
Version Incompatibility
All switches must use the same VTP version:
Switch(config)# vtp version 2
Trunk Misconfiguration
VTP relies on active trunks to propagate VLAN information. Verify trunk status:
Switch# show interfaces trunk
Pruning Disabled
Enable VTP pruning to optimize VLAN propagation:
Switch(config)# vtp pruning
Additional Resources
For a deeper understanding of VLAN Trunking Protocol, refer to the official Cisco guide: Configuring VLANs on Cisco Catalyst Switches.
Conclusion
Mastering the configuration of VTP clients and servers is essential for seamless VLAN management in Cisco Catalyst networks. By following this guide, you’ll be better prepared for practical implementations and the Cisco CCNA exam.